
Daniel Osborne, Features Reporter.
There is a moment most of us know well: standing in front of the mirror with wet hair, a dryer in hand, wondering why the result never matches the one from the salon. The bathroom cupboard usually tells the story, an old dryer from a decade ago next to a newer one bought in a hurry before a wedding, neither one quite right. The truth is that a hair dryer is a simple machine, motor, heating element, airflow, and most of what separates a good drying experience from a frustrating one comes down to understanding a handful of mechanics rather than chasing the newest gadget. One genuinely useful fact to start: the number that matters most for drying speed and smoothness is not wattage, it is airflow volume, something rarely printed clearly on the box. This guide walks through what to look for, what to ignore, and how to use whatever dryer you already own more effectively.
- Airflow matters more than wattage: a high-wattage motor with a poor nozzle can dry slower than a modest motor with good air concentration.
- Heat damage is cumulative, not dramatic: the mistake is holding heat too close for too long, not using a dryer at all.
- Technique changes outcomes more than the machine does: drying direction, distance and timing affect smoothness and frizz as much as the appliance itself.
Why Most First Dryers Disappoint
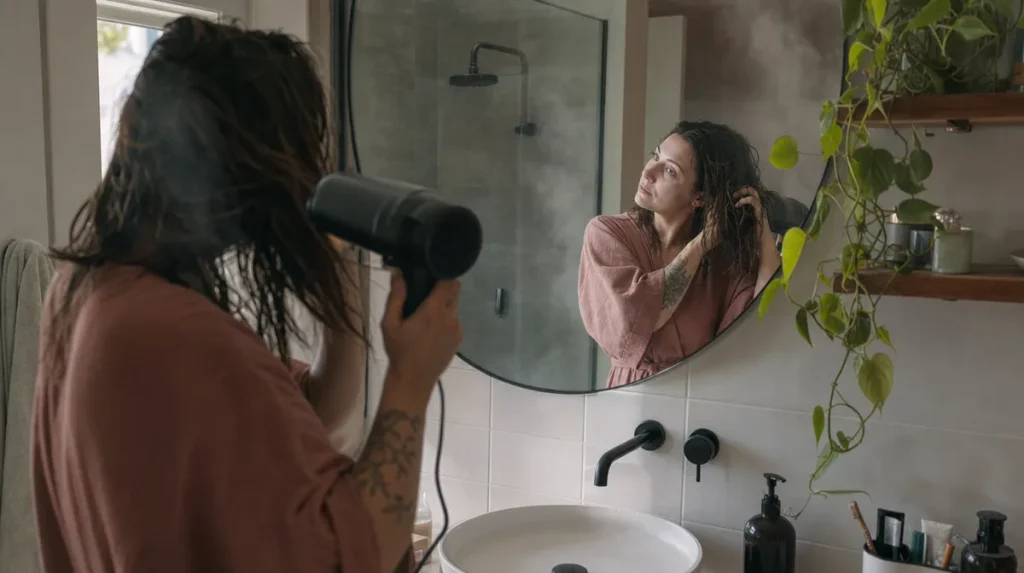
A dryer that feels underwhelming is rarely broken. It is usually mismatched to the person using it. Long, thick hair needs sustained airflow over several minutes, while fine, short hair needs a gentler, more controlled stream that will not blow it into a static halo. Buying on wattage alone is a bit like buying a car on engine size without checking the gearbox: the number sounds impressive but says little about how the power actually reaches the road.
A 2021 survey reported in a consumer technology review found that user satisfaction with hair dryers correlated more strongly with perceived control over heat and airflow than with the stated wattage of the unit. That lines up with what hairdressers notice day to day: a dryer that lets you dial in precise heat and speed combinations tends to outperform a blunt, single-setting model, regardless of how many watts sit on the label.
Before buying or judging a dryer you already own, try this quick self-test: dry a small section of hair at arm’s length for thirty seconds. If it feels like a gentle, steady push of warm air rather than a thin, hot jet, the airflow is likely well balanced. If it feels scorching and narrow, the nozzle design is doing more work than the heat setting, and that narrow heat concentration is worth avoiding for daily use.
Reading The Wattage Number Honestly
Wattage describes how much electrical power a motor draws, not how efficiently that power becomes moving air. Two dryers with identical wattage can produce noticeably different airflow depending on motor design and internal duct shape. This is why CHOICE, which has lab-tested household appliances since 1959, has long advised Australian shoppers to look past headline power figures and focus on how a product performs in practical use rather than on a single spec on the box.
Think of it the way you would think about a vacuum cleaner. A higher wattage model is not automatically better at lifting dirt if the airflow path is poorly engineered. The same logic applies here: a 2,000-watt dryer with a narrow, obstructed air path can feel weaker in the hand than a well-designed 1,800-watt one.
For most adults with mid-length hair, a dryer producing a steady, broad stream of warm air will dry hair within eight to twelve minutes, according to drying-time observations commonly cited in hairdressing trade training materials. If your current dryer takes noticeably longer than that on a dry, well-wrung section of hair, the issue is more likely airflow restriction than insufficient power.
The Nozzle Does More Than The Motor
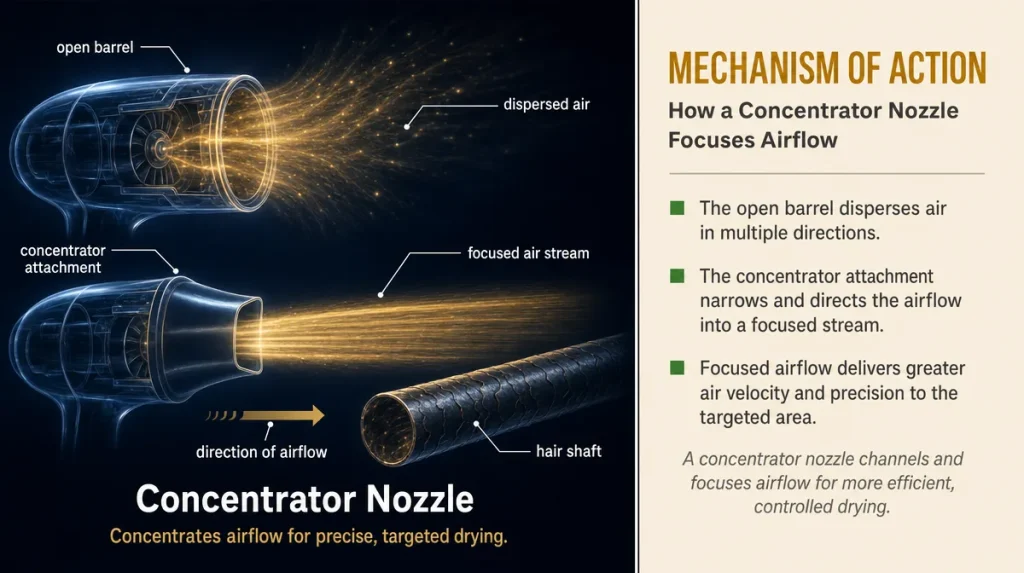
The concentrator nozzle, that narrow attachment most dryers come with, directs a wide stream of air into a focused channel. Without it, air disperses in every direction the moment it leaves the barrel, cooling faster and taking longer to smooth the hair shaft. With it, the same airflow becomes a directional tool that can be angled along the hair’s length.
Imagine the difference between an open garden hose and one fitted with a spray nozzle. The volume of water leaving the tap has not changed, but the nozzle lets you aim it precisely and control the pressure. A dryer nozzle works the same way for air.
A common mistake is discarding the nozzle because it feels like an unnecessary extra step. In practice, using it consistently, held two spans from the head and angled downward along the hair shaft, is one of the simplest ways to reduce frizz without changing anything else about the dryer or the routine. If your dryer has lost its nozzle, that alone can explain a rougher finish than you remember from before.
Ionic Technology, Marketing Claim Or Real Effect
Many dryers now advertise an ionic generator, a small component that emits negatively charged ions into the airflow. The stated purpose is to help break down water droplets on the hair surface and reduce the static charge that causes flyaways.
The effect is real but modest. A 2017 study published in a cosmetic science journal measured reduced static electricity and marginally faster drying times on hair treated with ionic airflow compared with standard airflow, though the difference was more noticeable on fine, static-prone hair than on coarse or curly textures. This matters because ionic technology is often marketed as a universal upgrade, when its benefit is genuinely concentrated in one hair type.
If your hair is thick, curly or coily, an ionic setting will not hurt, but it is unlikely to transform your results. If your hair is fine and prone to static, particularly in drier months, it may noticeably reduce the frizzy halo effect. The sensible approach is to treat ionic technology as a helpful extra for certain hair types, not a feature worth paying a premium for across the board.
Heat And Speed Settings, Used Properly
Most dryers offer two or three heat levels and two speed levels, and very few people use the full range. The common habit is to leave a dryer on high heat and high speed for the entire routine, which is efficient but also the setting most likely to stress the hair shaft over time.
A more considered rhythm: use high heat and high speed for the first half of drying, when hair still holds significant moisture and heat has more water to act on before it reaches the hair itself. As hair approaches eighty per cent dry, drop to medium heat. For the final pass, many dryers include a cool shot button, which sets the hair cuticle and locks in smoothness, a step hairdressers use routinely but home users often skip entirely.
The mistake everyone makes is continuing on full heat once hair is nearly dry. At that point there is little moisture left to evaporate, so the heat acts directly on the hair fibre rather than the water within it. A simple self-test: if you can hear the pitch of the airflow change from a damp, muffled sound to a drier, sharper one, that is usually the moment to drop the heat setting.
Diffusers, When They Help And When They Do Not
A diffuser attachment spreads airflow across a wider surface rather than concentrating it, and slows the air speed in the process. For curly and wavy hair, this is genuinely useful: fast, direct airflow disrupts curl formation and encourages frizz, while diffused air allows curls to dry in place with less disturbance.
For straight hair, a diffuser generally does not help and can even extend drying time unnecessarily, since the technique straight hair benefits from, directional tension with a brush, works against the gentler, cupping motion a diffuser is designed for.
The common error is buying a diffuser because it came bundled with the dryer and using it regardless of hair type, then concluding the dryer itself is underperforming. A diffuser is a tool for a specific texture, not a universal upgrade, and skipping it entirely is the right choice for straight or very fine hair.
The Drying Technique That Protects Your Ends
Hair ends are the oldest part of the strand and have endured the most brushing, sun and heat exposure over their lifespan, which makes them more porous and more prone to visible damage. Directing concentrated heat at the ends first, then working upward, is one of the most common technique mistakes, because it exposes the most vulnerable part of the hair to heat for the longest total time.
The more protective order is root to mid-length first, with the ends receiving airflow last and only briefly, generally on a lower heat setting. Keeping the nozzle at least two hand-spans from the scalp also reduces unnecessary heat concentration on any single section.
A useful boundary to remember: heat styling tools used on hair generally sit well below the temperatures associated with structural protein damage when kept moving and used at a reasonable distance, but sustained, close, static heat on one section is where visible dryness and roughness tend to develop over repeated use. Keeping the dryer moving, rather than holding it still on one spot, matters as much as the heat setting itself.
Maintenance That Extends The Life Of Any Dryer
The rear air intake filter, a small mesh grille at the back of most dryers, collects lint and hair over time. A blocked filter forces the motor to work harder to pull in air, which can both reduce airflow and cause the unit to overheat and shut off mid-use, a fault many people mistake for the motor failing.
Wiping this filter with a dry brush or cloth every few weeks, more often if the dryer is used daily, is the single most effective piece of maintenance available and costs nothing. It is also worth checking that the cord is not kinked near the handle, since repeated bending in the same spot is the most common cause of internal wire fatigue in handheld appliances.
A dryer that has suddenly become noisier, slower or prone to cutting out partway through a routine is more often suffering from a blocked filter than a failing motor, and checking the filter first can save an unnecessary replacement.
Key Takeaways
A hair dryer does not need to be expensive or heavily featured to work well. What matters is steady, well-directed airflow, a nozzle used consistently, heat settings adjusted as hair dries rather than left on high throughout, and a filter kept clean. Ionic and diffuser features are genuinely useful for specific hair types rather than universal upgrades, and technique, the order and direction in which heat is applied, has as much influence on the final result as the appliance itself.
A Quick Checklist Before You Dry
- Use the concentrator nozzle, angled downward along the hair shaft
- Start on high heat and speed, dropping to medium as hair nears eighty per cent dry
- Finish ends briefly and on lower heat, not first
- Use a diffuser only for curly or wavy textures
- Keep the dryer moving rather than holding it on one section
- Clean the rear filter every few weeks
- Use the cool shot button as a final step to set smoothness
This guide offers general information only and does not replace advice from a hairdresser or dermatologist.
Individual results vary depending on hair type, condition and styling habits.