
Priya Nair, Staff Writer.
You are standing at the bathroom mirror on a Tuesday morning, scrolling past four half-used blush pots on the shelf, trying to remember why you bought the one in the peach compact. Somewhere between the tenth tutorial and the fortieth comment thread, cream blush became the product everyone insists on and nobody quite explains. This guide skips the shade names and the brand noise. It walks through what cream blush actually does on skin, where beginners go wrong, and how to judge whether a formula is working for your face rather than someone else’s.
One fact worth knowing before anything else: cream blush can look different under daylight than under bathroom globes, because pigment suspended in an emollient base reads differently as the light’s colour temperature changes. Test near a window, not above the sink.
- Daylight reveals your real undertone: testing near a window beats judging colour under bathroom globes.
- Thin layers blend better than one heavy dab: cream formulas build colour fast, so less is genuinely more at first.
- Warm fingertips melt cream blush into skin more naturally than brushes: body heat does blending work that tools cannot.
Finding Your Undertone In Daylight
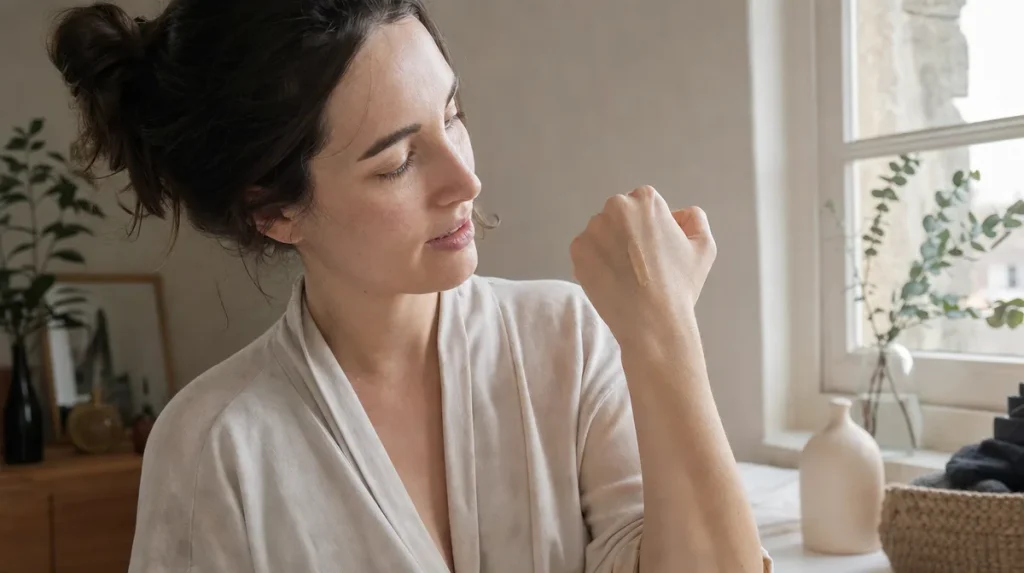
Most undertone confusion starts with lighting, not skin. Bathroom globes and overhead LEDs often sit at a warmer or cooler colour temperature than daylight, and pigment reads differently under each. A blush that looks flattering at 11pm under a yellow globe can look chalky or orange by 9am at the kitchen table.
The simplest fix borrows from how painters test colour: never commit to a paint swatch under shop lighting, always carry it to a window first. Do the same with blush. Dab a small amount on the back of your hand, walk to the nearest window and look at it in natural light before deciding anything.
A quick self-test: turn your wrist over and look at the veins in daylight. Greenish veins tend to sit alongside warmer undertones, blueish veins alongside cooler ones, though many Australian skin tones carry both warm and olive notes together, which is why relying on jewellery colour alone is a rougher guide than it sounds.
The mistake almost everyone makes early on is shopping for blush under the brightest light in a store, then wondering why the colour behaves differently at home. Skin, light and pigment all interact, so the test that matters is the one done in the room where you will actually wear it.
Cream Versus Powder: What Actually Changes On Skin
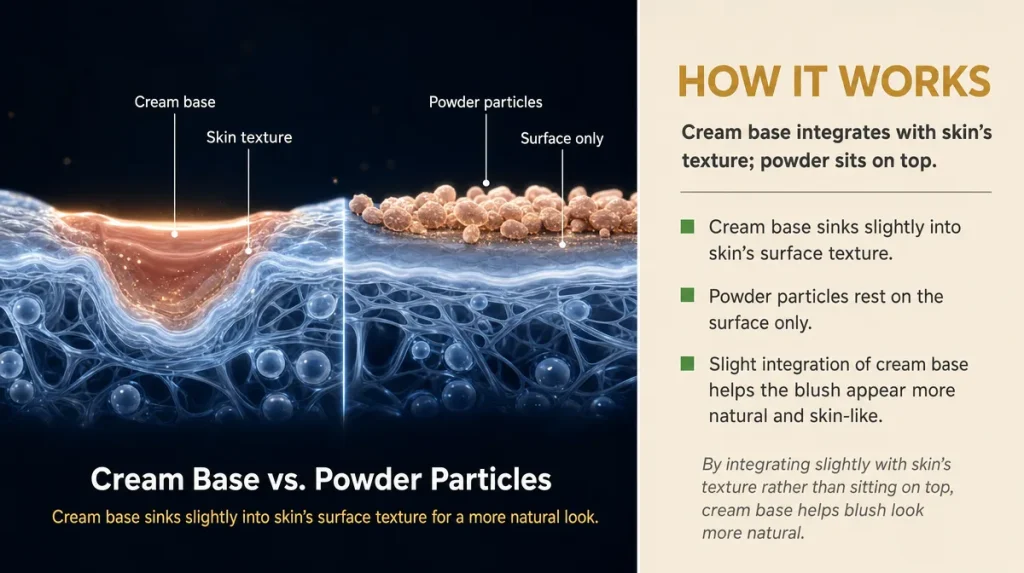
Cream blush and powder blush are not just different textures, they behave through different physical processes once they touch skin.
Powder blush works the way sugar sits on buttered toast: pigment particles rest on the skin’s surface, held loosely by the natural oils already there. Cream blush works more like butter melting into warm toast: the emollient base, usually a blend of oils, waxes or silicones, softens at skin temperature and lets pigment sink slightly into the skin’s texture rather than sitting on top of it.
This is why cream formulas tend to look more like a flush from within, while powder sits closer to a dusted colour. It also explains why cream blush can grab onto dry patches and flaking skin more visibly, since the pigment follows the texture underneath it.
A 2021 study in the International Journal of Cosmetic Science comparing emollient-based and particulate make-up bases found that emollient formulas showed measurably better adherence to skin with higher surface roughness, a technical way of saying cream blush clings to texture, smooth or not.
For beginners, the practical takeaway is simple. If skin is well moisturised and relatively even, cream blush will likely look more natural than powder. If skin is flaking or freshly exfoliated, the same cream will show every rough patch.
The Three-dot Placement Method
Placement decides more of the final look than shade does, and most beginners either apply too much in one spot or scatter dots too close to the nose.
Start with three small dots, roughly pea sized: one on the fullest part of the cheek (smile to find it), one slightly higher toward the temple, and one, optional, lightly on the bridge of the nose for extra warmth.
Blend outward and upward, toward the hairline, rather than downward toward the jaw. Downward blending tends to drag the face visually, while upward blending follows the natural lift of a smile.
A self-test while reading: smile now, find the apple of your cheek with one finger, and notice how far it sits from your nose. Most beginners place the first dot too close to the centre of the face, which can look like two separate spots of colour rather than a natural flush.
Work in thin layers and check progress every few strokes rather than applying all three dots and blending at the end. Cream pigment is concentrated, and it is far easier to add more than to remove excess once it has set.
Blending Tools: Fingers, Sponge Or Brush
Three tools dominate cream blush application, and each changes the result through a different mechanism.
Fingertips carry body heat, and that warmth softens the cream’s emollient base on contact, the same way holding a piece of chocolate in a warm palm starts to soften it before it melts properly. This tends to produce the most skin-like finish because the product is warming and thinning as you blend it.
A damp makeup sponge, by contrast, uses light pressure and a slightly textured surface to stipple colour into skin gradually, which suits beginners worried about applying too much too fast, since a sponge naturally absorbs some product rather than depositing all of it.
A brush, particularly a dense one, tends to sit on top of the emollient layer rather than working with it, and can leave visible strokes if the cream has already started to set before blending begins.
For a first attempt, fingertips are the most forgiving. Warm the product between two fingers for a few seconds before touching your face, which softens the formula and reduces the risk of depositing a hard edged dot that is then difficult to diffuse evenly.
Mistakes That Make Cream Blush Look Patchy
Patchiness is rarely about the product. It is almost always about the skin underneath it or the order of application.
The most common mistake is applying cream blush over dry, flaking patches, particularly around the cheekbone where skin can be thinner and more prone to dryness. The pigment settles into every rough edge, making the flaking more visible rather than less.
The second mistake is applying blush before the moisturiser underneath has properly absorbed. Cream products need a settled base to grip evenly. Over a moisturiser still sitting wet on the surface, blush can slide and streak rather than blend.
The third mistake is using too much pressure while blending, which can push product into pores rather than across the skin’s surface, leaving concentrated spots of colour rather than an even wash.
The fix for all three is sequencing: moisturise, wait roughly two to three minutes for the skin to absorb it, then apply blush in thin layers with light pressure. If a patch still looks uneven, a small amount of moisturiser pressed, not rubbed, over the area afterwards will usually soften the edge.
How Long It Should Last, And How To Judge Results
Most cream blush formulas are designed to visibly hold colour for roughly six to eight hours on normal to dry skin, somewhat less on oily skin where surface oil can dissolve the emollient base over the course of a day.
A fair way to judge a formula is not whether it has faded by evening, since some fading is expected, but how it fades. A well formulated cream blush tends to fade evenly, becoming softer rather than patchy. A formula that fades unevenly, leaving visible edges or concentrated spots where it was first applied, is usually telling you something about the base ingredients or how it interacts with your particular skin.
Results may vary considerably by skin type, humidity and how much the face is touched during the day, so judging a single wear is less useful than tracking the pattern over a week or two.
A simple self-test: apply as usual, then check at midday and again at the end of the day, noting whether the colour has simply softened or genuinely moved into creases or pores. The first is normal wear. The second usually means the formula or the amount applied needs adjusting.
What’s Marketing And What’s Mechanism
Ingredient lists for cream blush are shorter than most skincare products, which makes it easier to separate what actually changes performance from what is simply described well on packaging.
The ingredients doing the functional work are usually emollients, oils, waxes or silicone based ingredients such as dimethicone, that carry the pigment and allow it to blend, along with humectants like glycerin that help the formula feel less draggy on application. Pigments themselves, often iron oxides or mica, determine shade and finish.
Terms like glow infused, skin loving or radiance activating describe a marketing promise rather than a measurable mechanism, and are not regulated the way active skincare claims are. They are not necessarily false, but they rarely tell you anything about how the formula will behave on your particular skin.
One area worth genuine attention: cream blush is not a sunscreen substitute. Cancer Council guidance on everyday sun protection notes that tinted products, including blush and tinted moisturiser, generally do not provide reliable broad spectrum coverage unless specifically formulated and labelled as SPF products, so a separate sunscreen underneath remains the more reliable step for daytime protection.
When reading a label, the practical question is not how the formula is described, but what the first five ingredients are and whether any of them, fragrance, certain alcohols, are known to irritate your particular skin.
When To Skip Cream Blush Altogether
Cream blush is not the right fit for every skin, and knowing when to skip it saves both money and frustration.
Oily and combination skin, particularly through the T-zone and cheeks, can struggle to hold cream formulas through a full day, as surface oil breaks down the emollient base faster than on dry or normal skin. Powder, applied over a light setting spray, often holds more consistently in these cases.
Skin prone to visible texture, enlarged pores or active breakouts can also find that cream formulas settle into exactly the areas they would rather minimise, for the same reason cream clings to dry flaking skin. The Australasian College of Dermatologists’ general public guidance on product layering for acne-prone skin notes that heavier, occlusive formulas can contribute to congestion in some individuals, a reasonable prompt to patch test a small area first, particularly along the jaw, before applying cream blush across the whole cheek.
Finally, anyone with rosacea or very reactive skin may find that the frequent blending and touching cream formulas often require aggravates redness rather than disguising it. In these cases, a lighter touch, less frequent reapplication, or a different product entirely may serve the skin better than persisting with a formula that keeps fighting the skin underneath it.
Key Takeaways
- Test shade and undertone in daylight, never under bathroom globes alone.
- Apply in thin layers using the three-dot method: cheek apple, temple, optional nose bridge.
- Blend with warm fingertips for the most natural finish, a sponge if a softer result is preferred.
- Moisturise first and wait a few minutes before applying blush, to avoid patchiness.
- Judge a formula by how evenly it fades, not simply whether it has faded by evening.
- Cream blush does not replace sunscreen underneath.
- Oily, textured or reactive skin may suit powder, or a lighter touch, better than cream.
A Quick Before-you-buy Checklist
- Have I tested this near a window, not just under shop lighting?
- Is my skin moisturised and settled before I apply anything?
- Am I using a pea sized amount per dot, not a full fingertip load?
- Am I blending upward and outward, away from the nose?
- Does the formula fade evenly on my skin over a full day, or patch and crease?
- Do I still need sunscreen underneath, regardless of what the blush promises?
This guide is general information and does not replace personalised advice from a dermatologist.
Individual results vary depending on skin type and application.